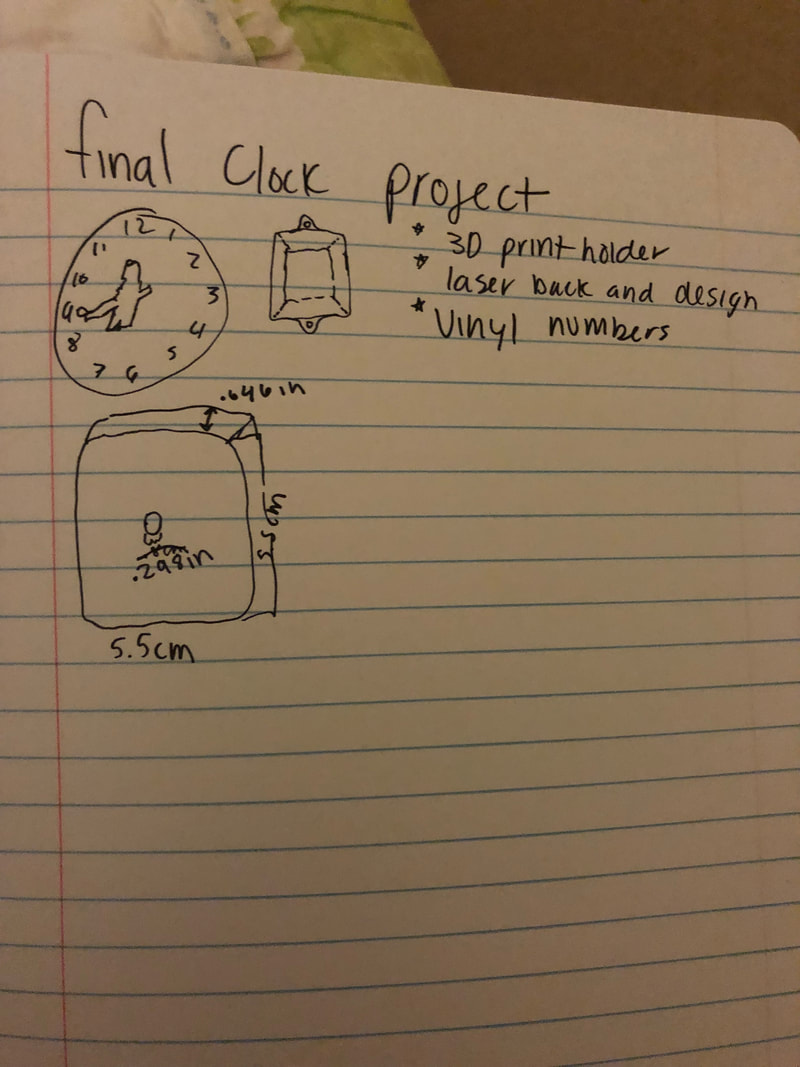
Creating my personal clock, mount
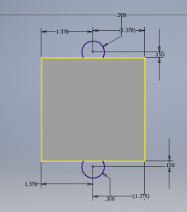
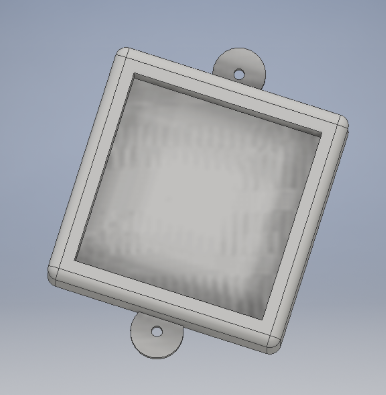
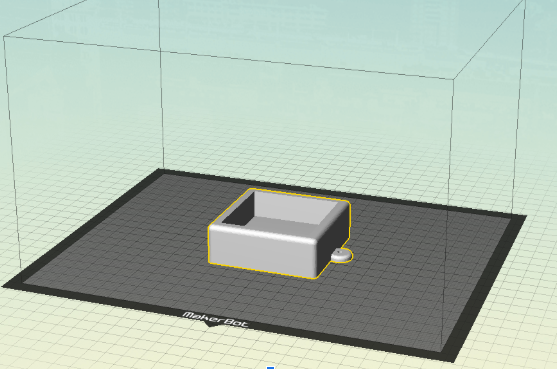
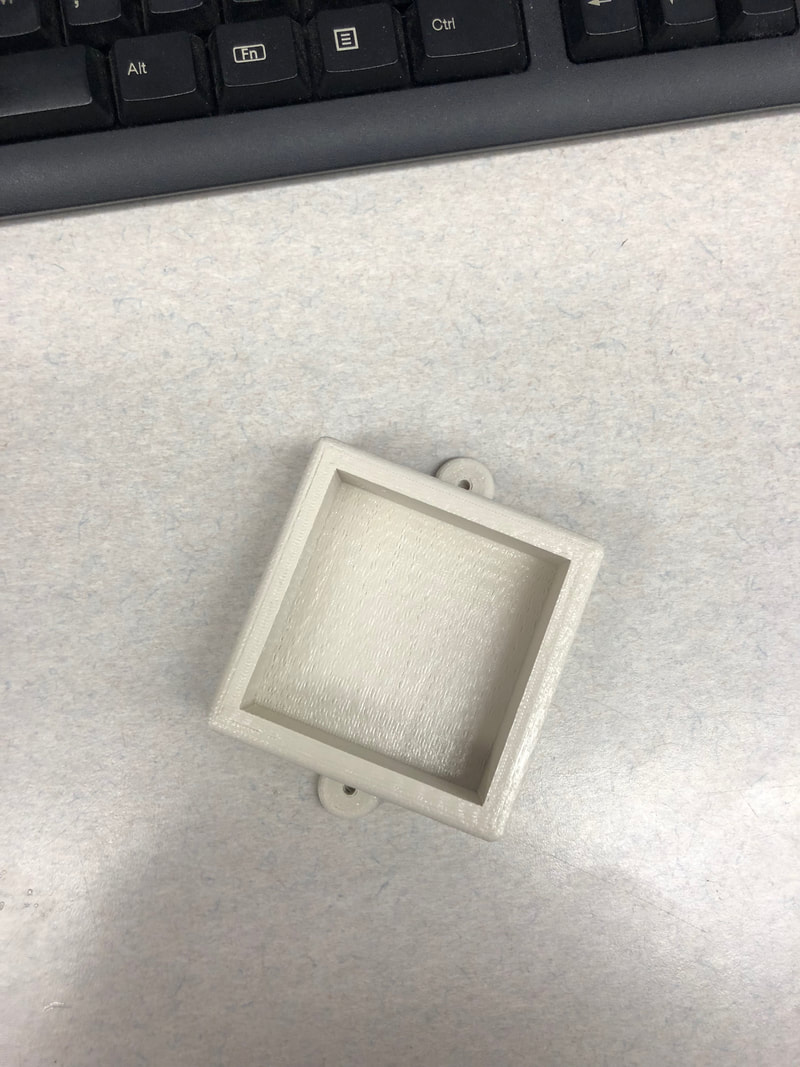
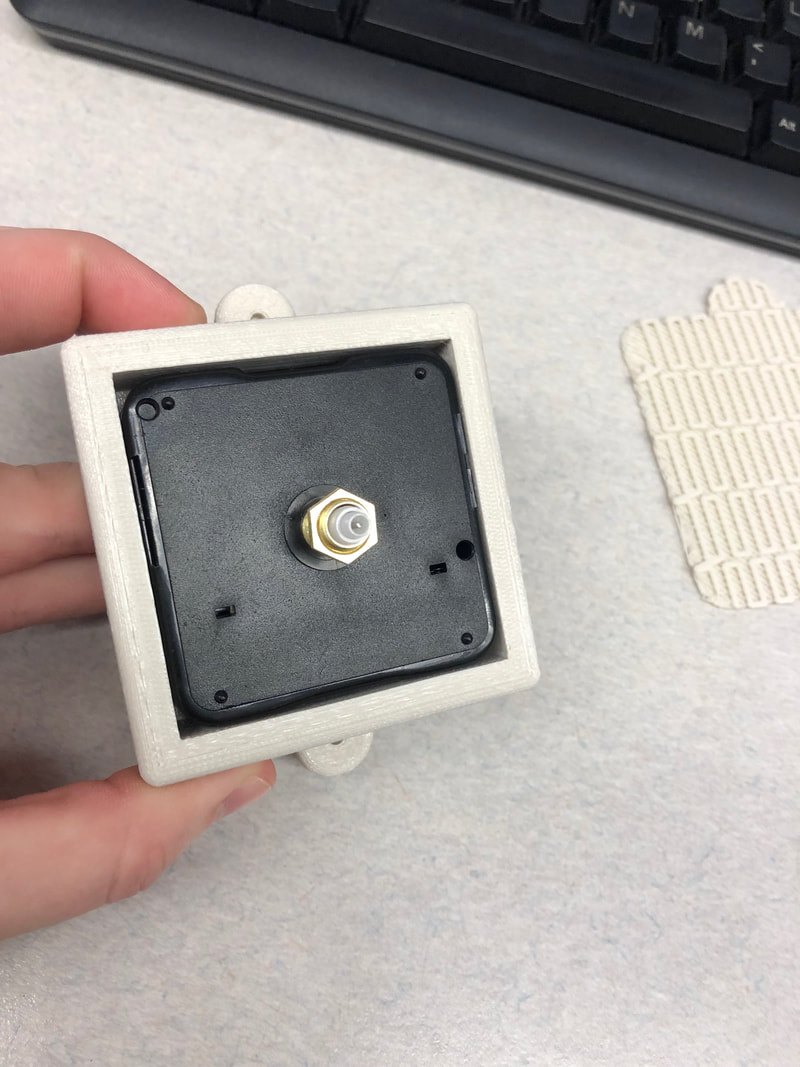
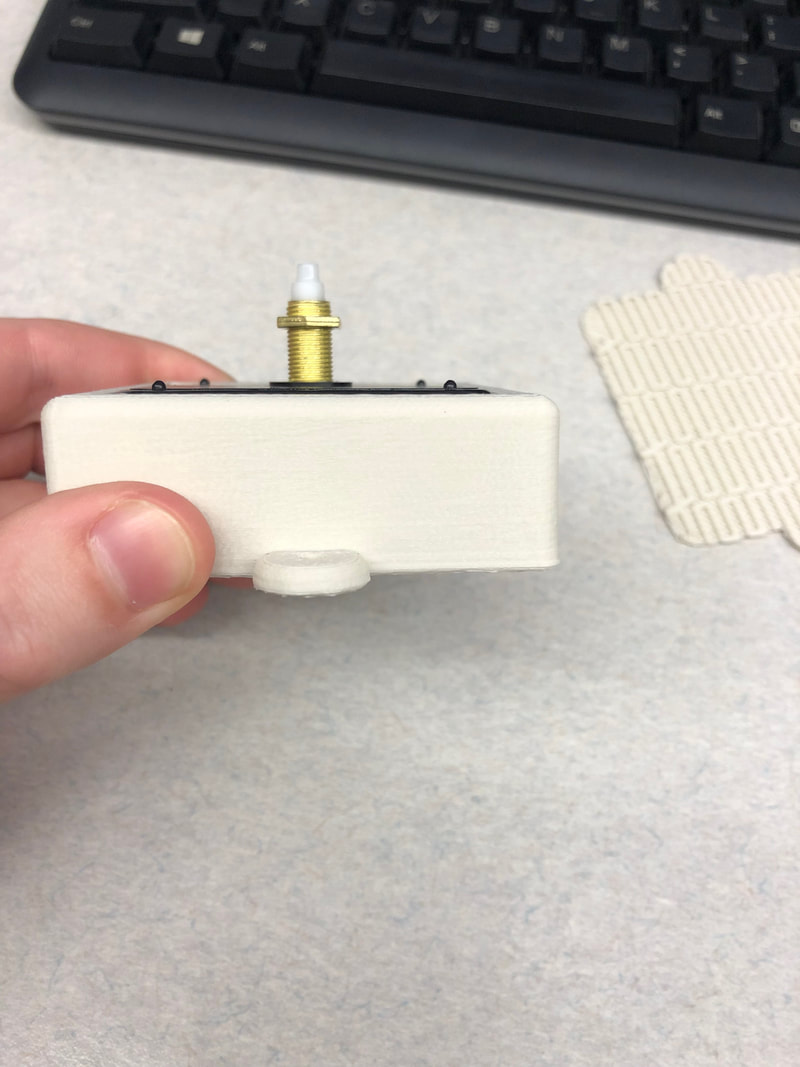
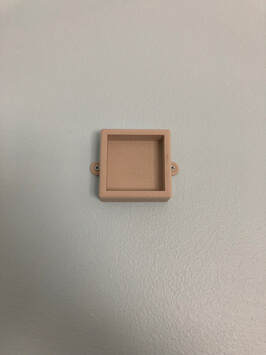
TWe were tasked with building a clock and had to at least three machines. When I started planning I decided I wanted to laser engrave the back out of matboard, vinyl cut numbers and 3D print a back to the clock so I am able to screw it up on a wall. I started the design for the mount because I knew that the 3D print would take the most time out of the three. I used the measurements I got from the sample and created the mount. Then I saved it as CAD format and an stl file, uploaded it onto makerbot and scaled it 1000%. The print took just over two hours.
Face of the clock
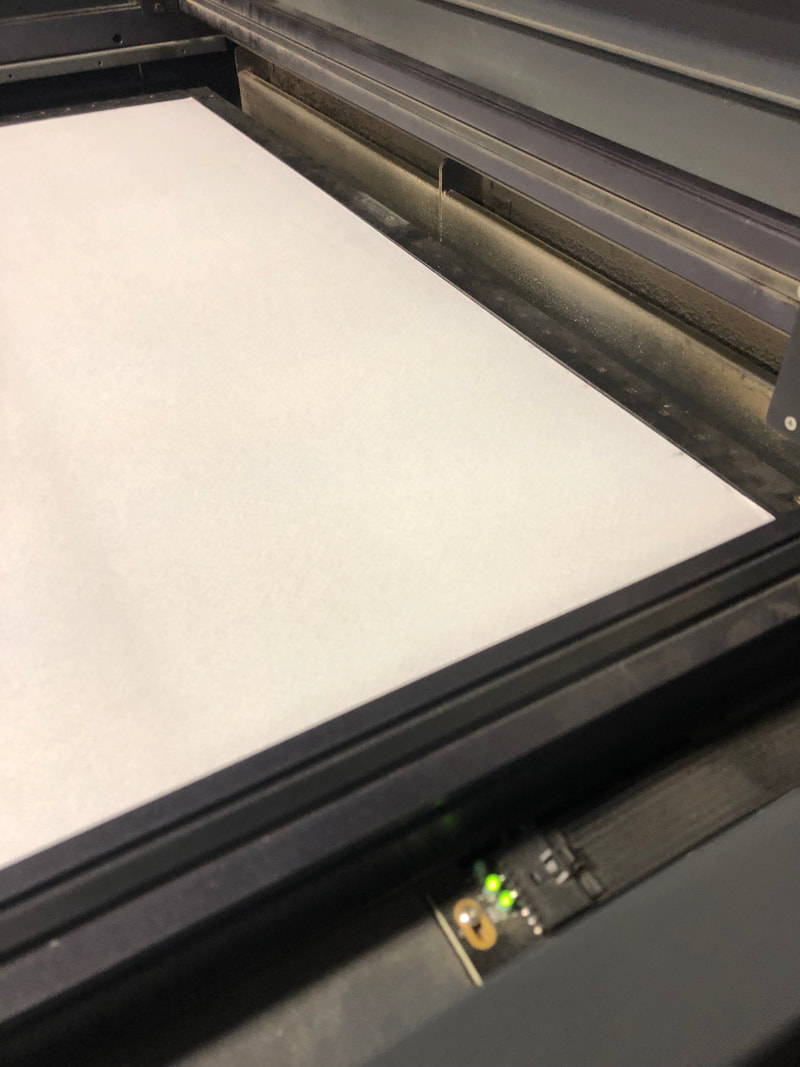
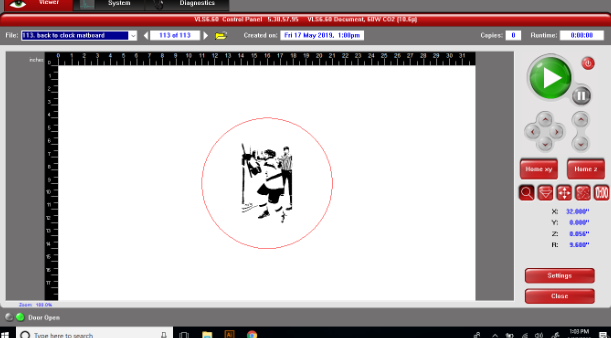
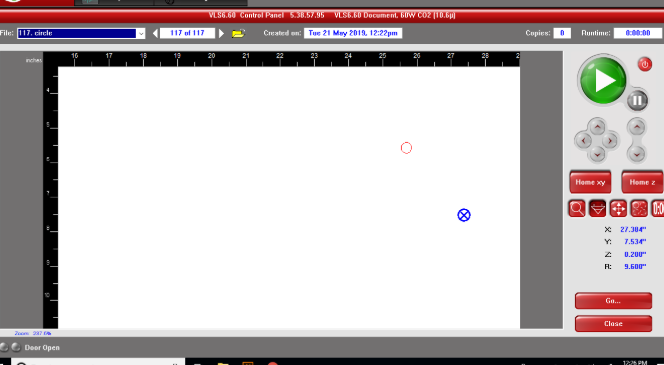
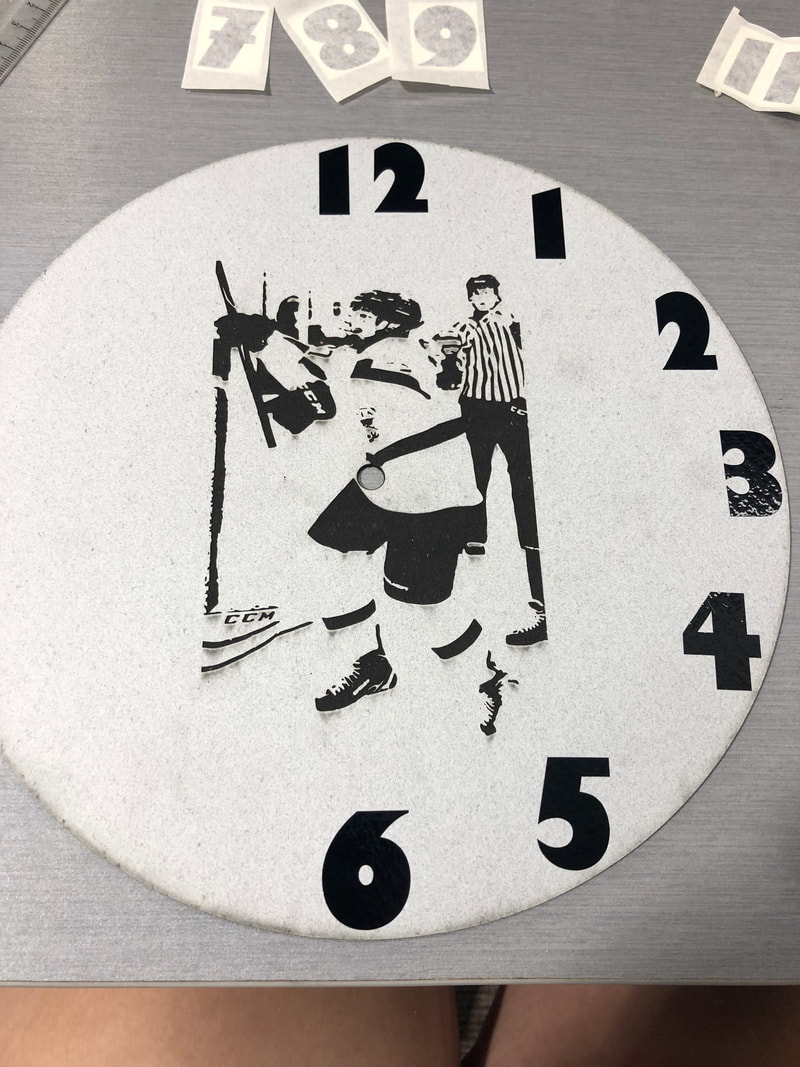
After I printed the mount correctly I started to design the face of the clock. I chose what picture of myself that I wanted to use and created a Illustrator file with it on there. I made the width and height of the clock 10 inches because the longest hand will just reach to where I will put the numbers. The outer rim is red so the laser will cut and myself is black so it will engrave onto the matboard. I set the laser up and made my design sit in the upper corner and hit play. The whole process took 13 minutes and 4 seconds.
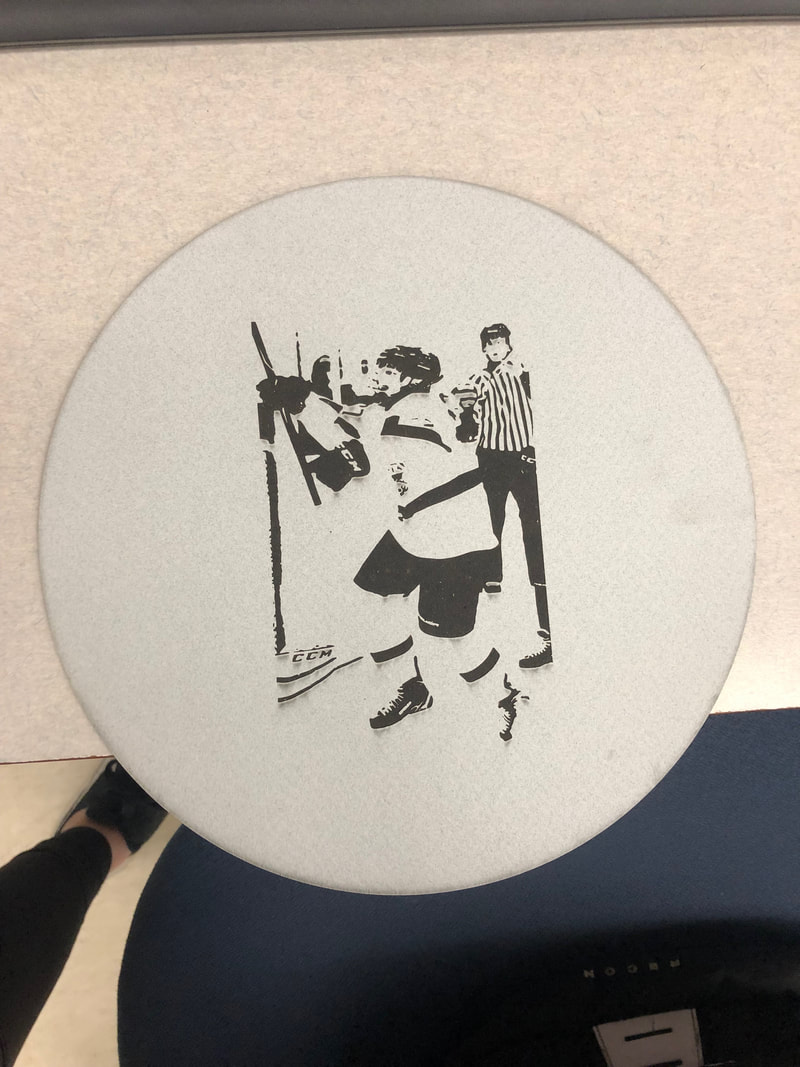
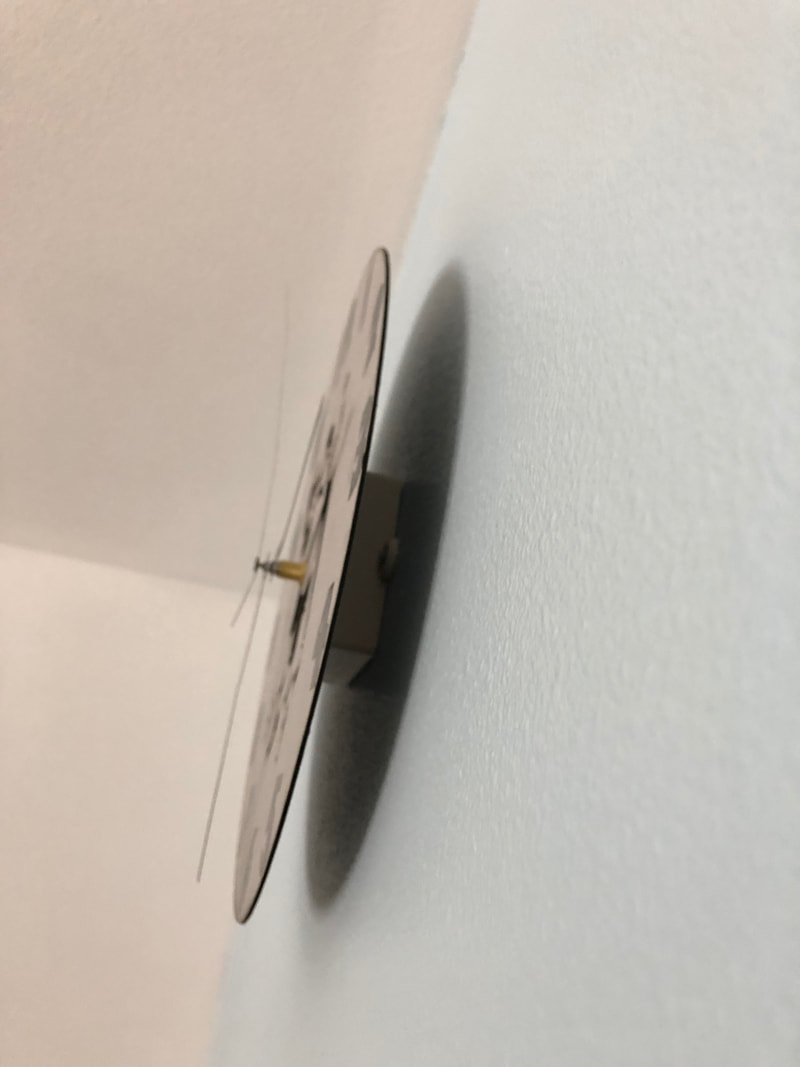
Then I created the circle so the clock piece will be able to be seen on the face from the back. I could have done this in one step but I forgot to include it.

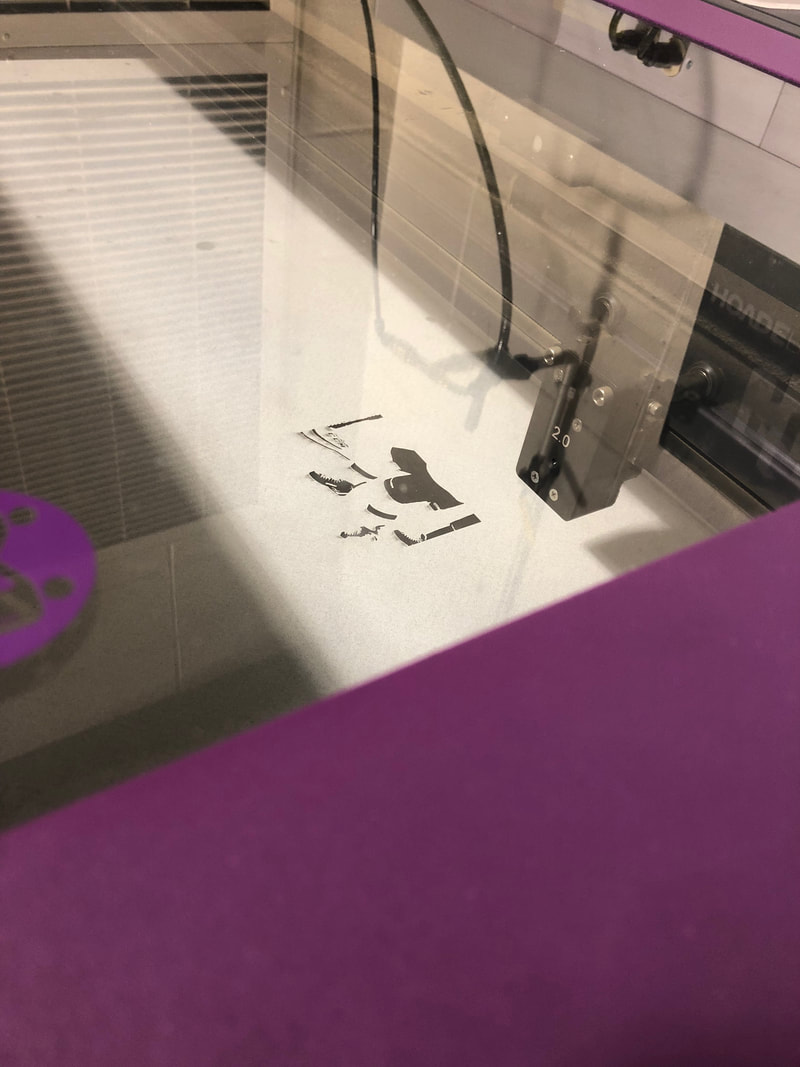
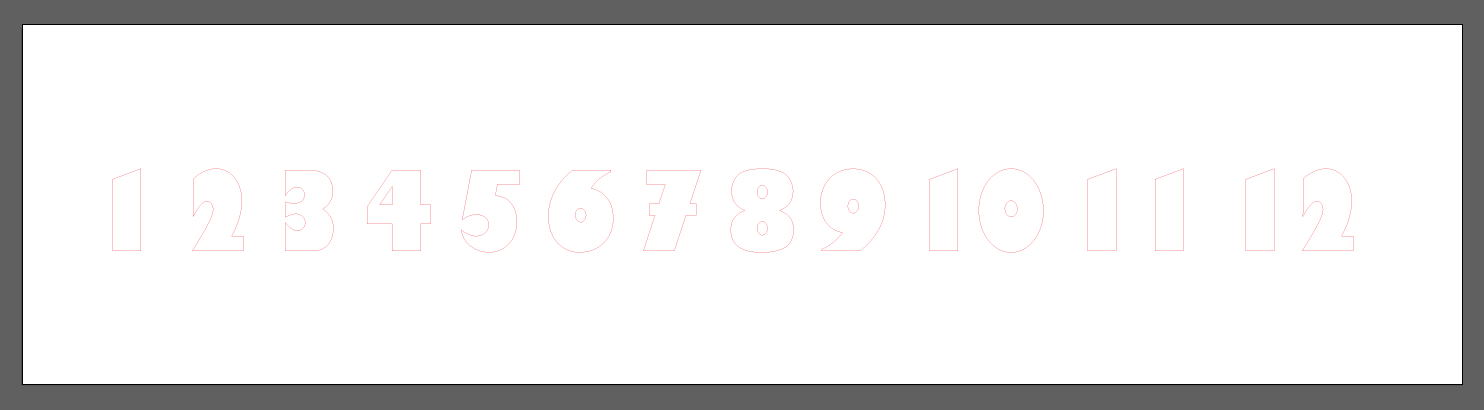
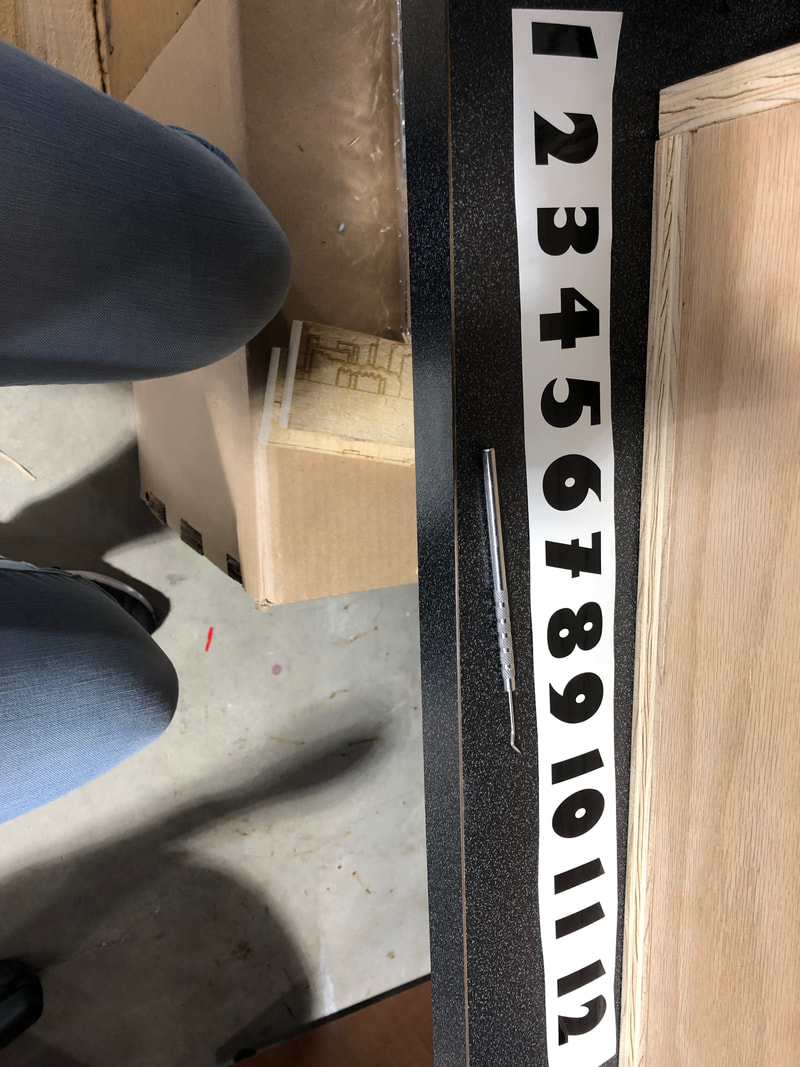
Once that was complete I made the numbers for the face of the clock on Illustrator. Then I saved it and opened it up on the computer at the vinyl cutter. I selected it all and went to file, cutting master 2, then cut plot. I loaded the black roll I wanted and had the machine measure its width. I was then ready to hit send because the design defaulted to the upper left hand corner minimizing space use.
Making the numbers
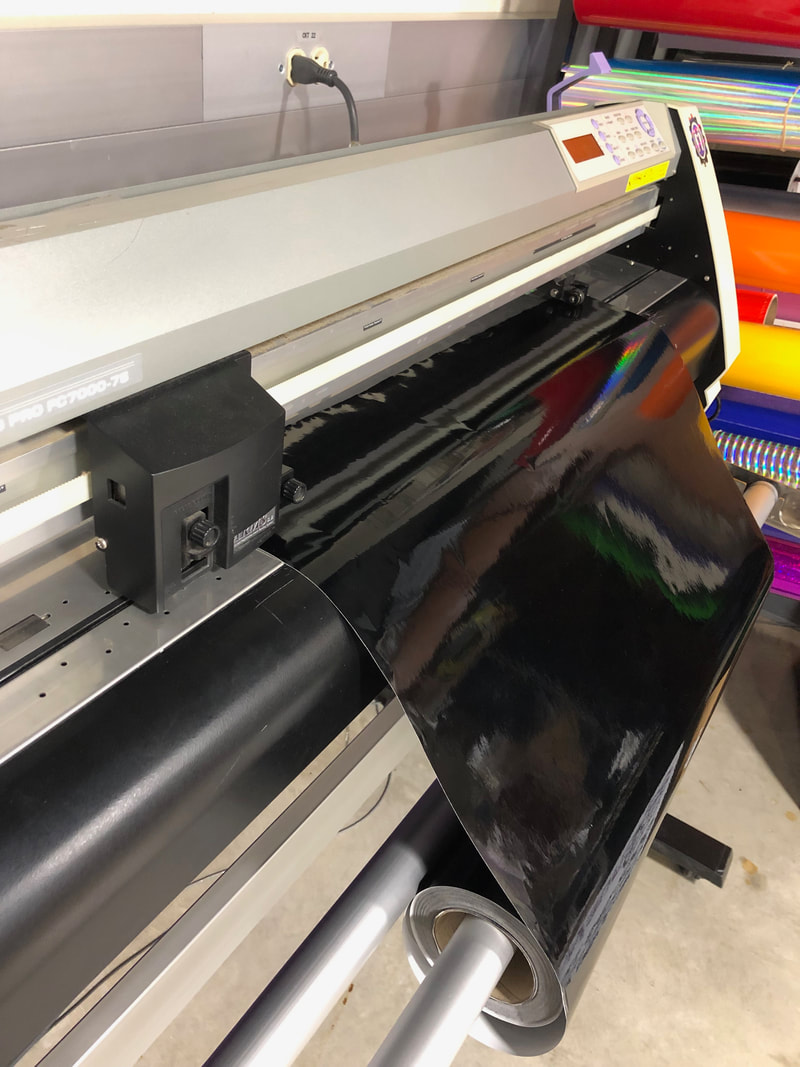
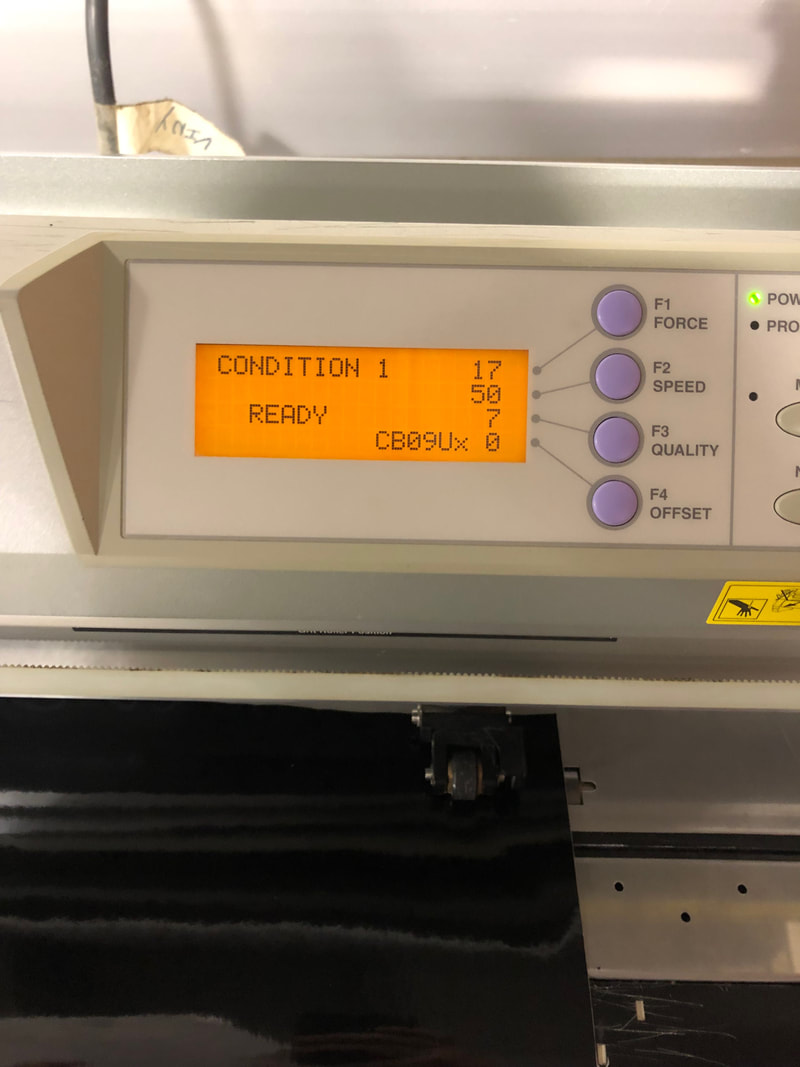
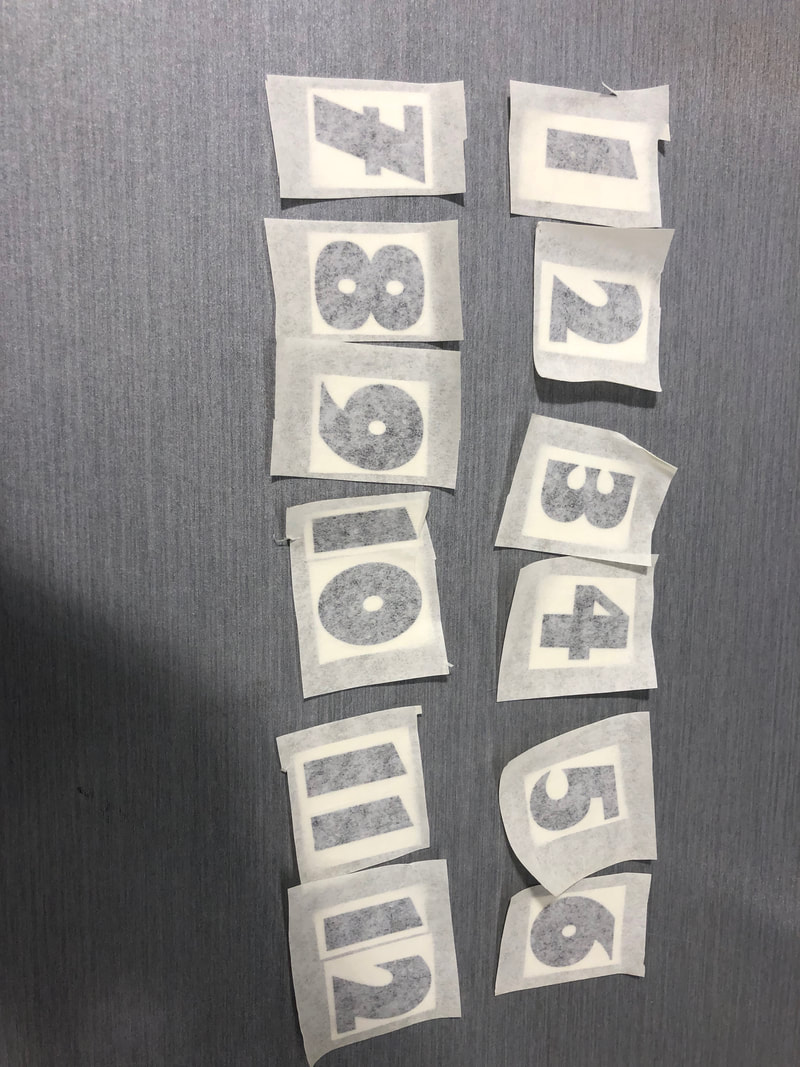
After my clock back was finished I used illustrator to create my numbers. It is hard to see the numbers on the illustrator file but they are there. I loaded the vinyl machine, then I went to file cutting master 2 then cut plot. This brought up the vinyl and I re-positioned my design to the upper corner and hit send. I took off the back extras and used the dental tool to weed the numbers. I put each number onto an individual piece so I could place each one. To put it onto the mat board I used a squeegee and peeled back the transfer tape.
Placing the clock
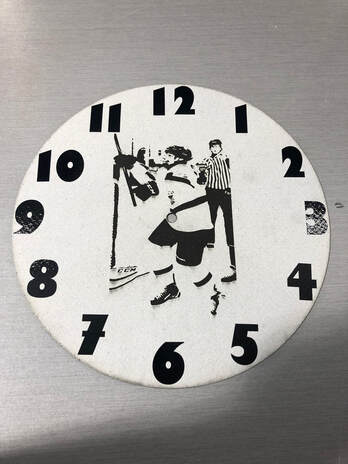
All I had to do left was put my clock up on my wall. I screwed the mount onto the wall with screws and then I placed the face with the hands into it and that was it!
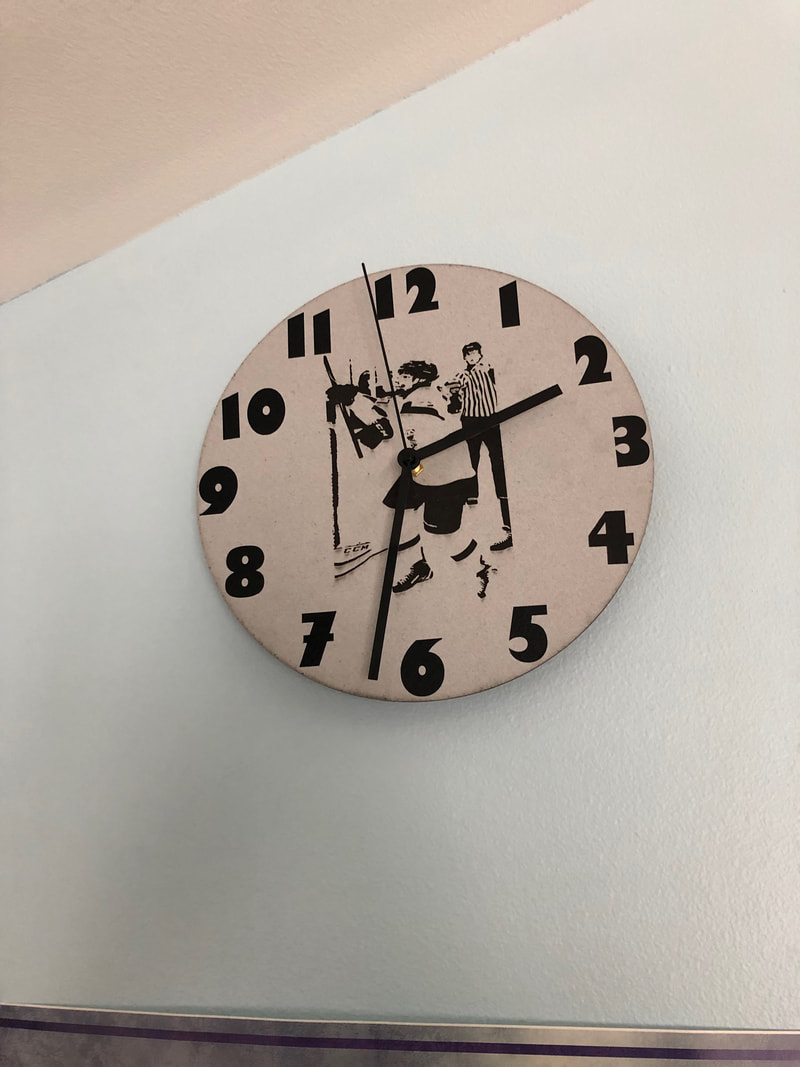
This is the final product. I had a lot of fun this semester and complete a lot of projects. I learned how to make all kinds of designs and how to print them on different things or with different materials. I learned especially in this project how to time manage. I would recomend this class to anyone that wants to learn more about various designing programs such as fusion, inventor, or illustrator.
